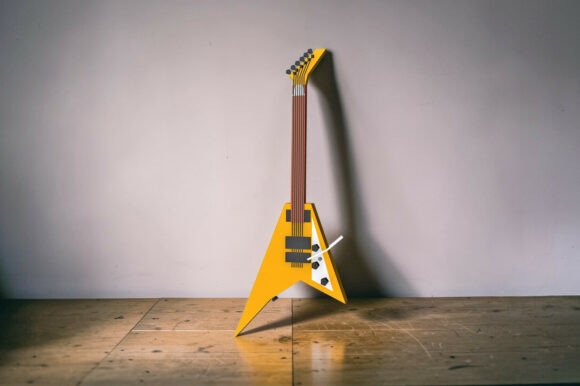
Flying Guitar - 3d Papercraft
The Flying Guitar - 3d Papercraft is a unique and engaging project that combines creativity with precision. Designed for enthusiasts who enjoy hands-on activities, this papercraft allows users to build a detailed 3D model of a flying guitar. The process involves printing templates, cutting, scoring, bending, and gluing the pieces together. This project is ideal for those looking to add a personal touch to their workspace, create a conversation piece, or explore the world of 3D modeling in a tangible way.
Whether you're an artist, a hobbyist, or someone interested in creative projects, the Flying Guitar - 3d Papercraft fits into various workflows. It can serve as a fun break from routine tasks, a way to engage in a collaborative activity, or even a tool for teaching spatial reasoning and design principles. Its versatility makes it suitable for both individual and group settings, offering opportunities for learning and expression.
Understanding the Workflow
Integrating the Flying Guitar - 3d Papercraft into your workflow requires some planning and preparation. Before starting, it's essential to gather all the necessary materials. You'll need a colored printer, glue, scissors, a craft knife, a scorer or bone folder, a non-working ballpoint pen, a ruler, and A4 letter cardstock paper. These tools ensure that the assembly process is smooth and efficient.
Once you have the materials ready, the next step is to print the templates. The digital files provided include PDF, DXF, EPS, PNG, and JPG formats, making it easy to access and use them on different platforms. Printing the templates full size on A4 paper ensures that the final product maintains its intended dimensions. After printing, carefully cut out each piece, score the fold lines, and bend them according to the instructions.
The assembly process typically takes between 3 to 4 hours, depending on your experience and attention to detail. This timeframe allows for a thorough and accurate build, ensuring that the final result is both visually appealing and structurally sound. By following the steps methodically, you can avoid common pitfalls such as misalignment or improper adhesion.
Practical Applications and Integration
The Flying Guitar - 3d Papercraft can be used in various contexts, enhancing both personal and professional environments. For instance, it can be incorporated into a creative workspace as a decorative element, adding a touch of personality and inspiration. In educational settings, it serves as a hands-on activity that teaches students about design, geometry, and craftsmanship.
In a business context, the Flying Guitar - 3d Papercraft can be part of a team-building exercise, encouraging collaboration and problem-solving. It also offers a unique way to showcase creativity during presentations or events, providing a memorable and interactive element. For entrepreneurs and marketers, this project can be a valuable addition to a product line, offering a tangible item that reflects brand identity and values.
When integrating the Flying Guitar - 3d Papercraft into your workflow, consider the timing and resources required. Planning ahead ensures that you have enough time to complete the project without rushing. Additionally, organizing your materials and workspace can significantly improve efficiency, reducing the likelihood of errors and delays.
Enhancing the Process with Best Practices
To maximize the benefits of the Flying Guitar - 3d Papercraft, adopting best practices can make a significant difference. One key tip is to work in a well-lit and organized space. This not only improves visibility but also helps in maintaining focus and accuracy throughout the assembly process.
Another important consideration is the quality of the materials used. High-quality cardstock paper ensures that the final product is durable and visually appealing. Using a sharp craft knife and a precise ruler helps in achieving clean cuts and accurate measurements, which are crucial for a successful build.
Additionally, taking breaks during the assembly process can prevent fatigue and maintain a high level of attention to detail. This approach not only enhances the quality of the final product but also makes the experience more enjoyable. By incorporating these practices, you can streamline the workflow and achieve better results.
Long-Term Use and Maintenance
Once completed, the Flying Guitar - 3d Papercraft can be a lasting addition to your collection or workspace. Proper maintenance ensures that it remains in good condition over time. Avoid exposing it to excessive moisture or direct sunlight, as these factors can damage the paper and affect the structural integrity of the model.
Regular cleaning with a soft cloth can help preserve the appearance of the model, keeping it looking vibrant and fresh. If any parts become loose or damaged, careful reassembly using the same techniques can restore the model to its original state. This adaptability makes the Flying Guitar - 3d Papercraft a versatile and enduring project.
For those interested in expanding their papercraft skills, the Flying Guitar - 3d Papercraft serves as a solid foundation. Exploring other papercraft designs and projects can further enhance your understanding of 3D modeling and construction. This ongoing learning process encourages continuous growth and creativity.